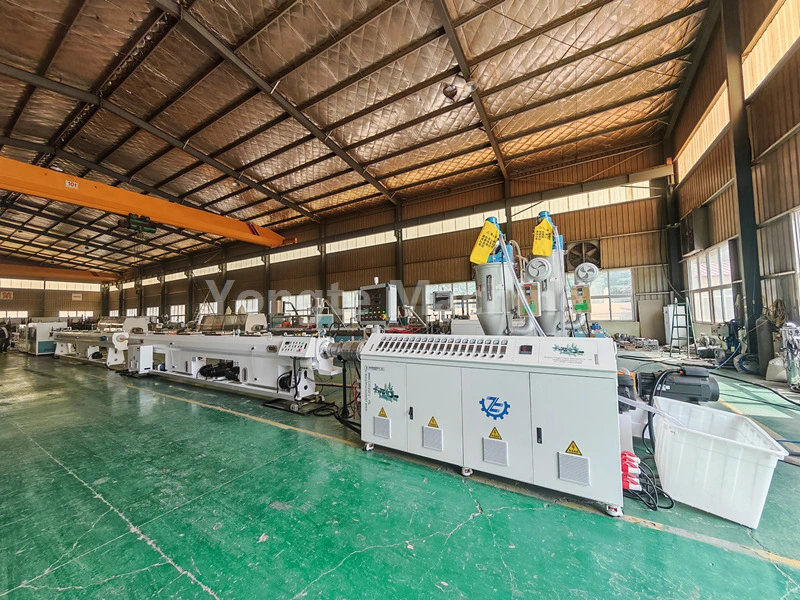
In the PPR pipe production process, wall thickness uniformity directly determines the pipe's pressure resistance, service life, and compliance. It requires systematic control from four core dimensions: equipment configuration, process parameters, raw material control, and online testing. Leveraging the technological advantages of Yongte's PPR pipe production line, specific measures are as follows:
Using PPR-specific die heads with a processing accuracy ≤0.01mm ensures the concentricity deviation between the die core and die sleeve is controlled within 0.02mm. Before production, the die lip gap is checked using a dial indicator, and the die lip bolts are manually fine-tuned (adjustment ≤0.05mm per turn) to ensure consistent circumferential clearance. Yongte's production line is equipped with precision forming molds that have a built-in concentricity adjustment mechanism for quickly correcting assembly deviations.
Employs a high-plasticity single-screw extruder (e.g., SJ65/33 model) with a gradually tapering screw design to ensure uniform PPR material melting and prevent extrusion pressure fluctuations caused by uneven plasticization. It is also equipped with a melt pressure sensor to monitor the melt pressure at the die head in real time, controlling fluctuations within ±2 bar. Stable pressure is a prerequisite for uniform wall thickness.
Utilizes a dual-track servo traction machine with strictly matched traction and extrusion speeds, achieving a speed fluctuation error of ≤0.5%. This prevents excessively fast traction from causing pipe stretching and thinning, or excessively slow traction from causing pipe accumulation and thickening. The Yongte production line's traction machine is equipped with an intelligent speed linkage system that automatically adjusts the traction speed according to the extrusion volume, achieving dynamic balance.

Temperature curves are set according to the principle of "low-temperature feeding, medium-temperature plasticizing, and high-temperature homogenization" (typical temperatures: hopper section 160-170℃, compression section 180-190℃, homogenizing section 200-210℃, die section 195-205℃); the temperature deviation of each zone of the die is controlled within ±3℃ to prevent excessively high local temperatures from causing uneven melt viscosity and resulting in excessively thick walls.
After fixing the screw speed, the wall thickness is finely adjusted by the traction speed: when the speed remains constant, increasing the traction speed results in thinner walls, and decreasing the traction speed results in thicker walls; the linear speed ratio of the two should be kept stable during production (recommended 1:1.05-1:1.1) to avoid frequent speed adjustments that cause wall thickness fluctuations.
A combination of vacuum sizing and segmented cooling is employed. The vacuum level in the sizing tank is maintained at -0.06 to -0.08 MPa, ensuring a tight fit between the pipe's outer wall and the sizing sleeve. Cooling is divided into three stages (rapid cooling at the beginning, slow cooling in the middle, and insulation at the end) to prevent uneven shrinkage of the inner and outer walls of the pipe caused by rapid cooling, which could lead to wall thickness deviations. Yongte's 8-meter vacuum cooling tank is made of 304 stainless steel, ensuring uniform water flow distribution and stable cooling efficiency.
PPR-specific resin with a melt index (MI) fluctuation ≤0.1 g/10 min is selected to avoid large differences in MI between different batches of raw materials, which could cause fluctuations in extrusion flowability. Simultaneously, the raw materials must be dried (moisture content ≤0.02%) to prevent moisture from vaporizing and forming bubbles during extrusion, thus maintaining wall thickness uniformity.
Impurities and excessively high recycled material ratios are strictly prohibited in raw materials (recycled material ratio is recommended to be ≤10%). Impurities will clog the die lip gap, and the plasticizing performance of recycled material will be unstable, both of which will cause local wall thickness abnormalities.
An online laser thickness gauge is installed at the rear of the traction machine to detect the wall thickness of the pipe at 8 points along the circumference in real time, with a detection accuracy of ±0.02mm. The system can automatically generate a wall thickness deviation curve. When the deviation exceeds the standard value (e.g., ±5%), an alarm is triggered, and the die lip bolts or traction speed are adjusted accordingly to achieve closed-loop control.
Manual sampling inspection is performed every hour, using calipers to measure the wall thickness of the same cross-section of the pipe at different locations. Data is recorded and a quality traceability ledger is established to promptly identify hidden deviations in equipment or processes.
Regularly clean the slag inside the die head (it is recommended to clean it after each shift). Slag can obstruct melt flow, causing local wall thickness increases. Regularly calibrate the speed sensors of the screw and traction machine to ensure accurate parameter display.
Operators must undergo professional training and are strictly prohibited from arbitrarily changing process parameters; when changing production specifications, the extruder barrel and mold must be thoroughly cleaned to avoid cross-contamination of raw materials of different specifications.